Fall

Showing posts with label Grandmothers sewing room. Show all posts

Friday, November 21, 2014

GRANDMOTHER'S SEWING ROOM: Precious Moments Burp Rags

Precious Moments Burp Rags
I made some more burp rags for our newest addition, Baby Tristen.

My sister sent this wonderful pack of diapers that are NOT pre-folded!!  I hadn't seen these in YEARS.. so glad she found them... gotta love Amazon!  Link to Diapers at Amazon


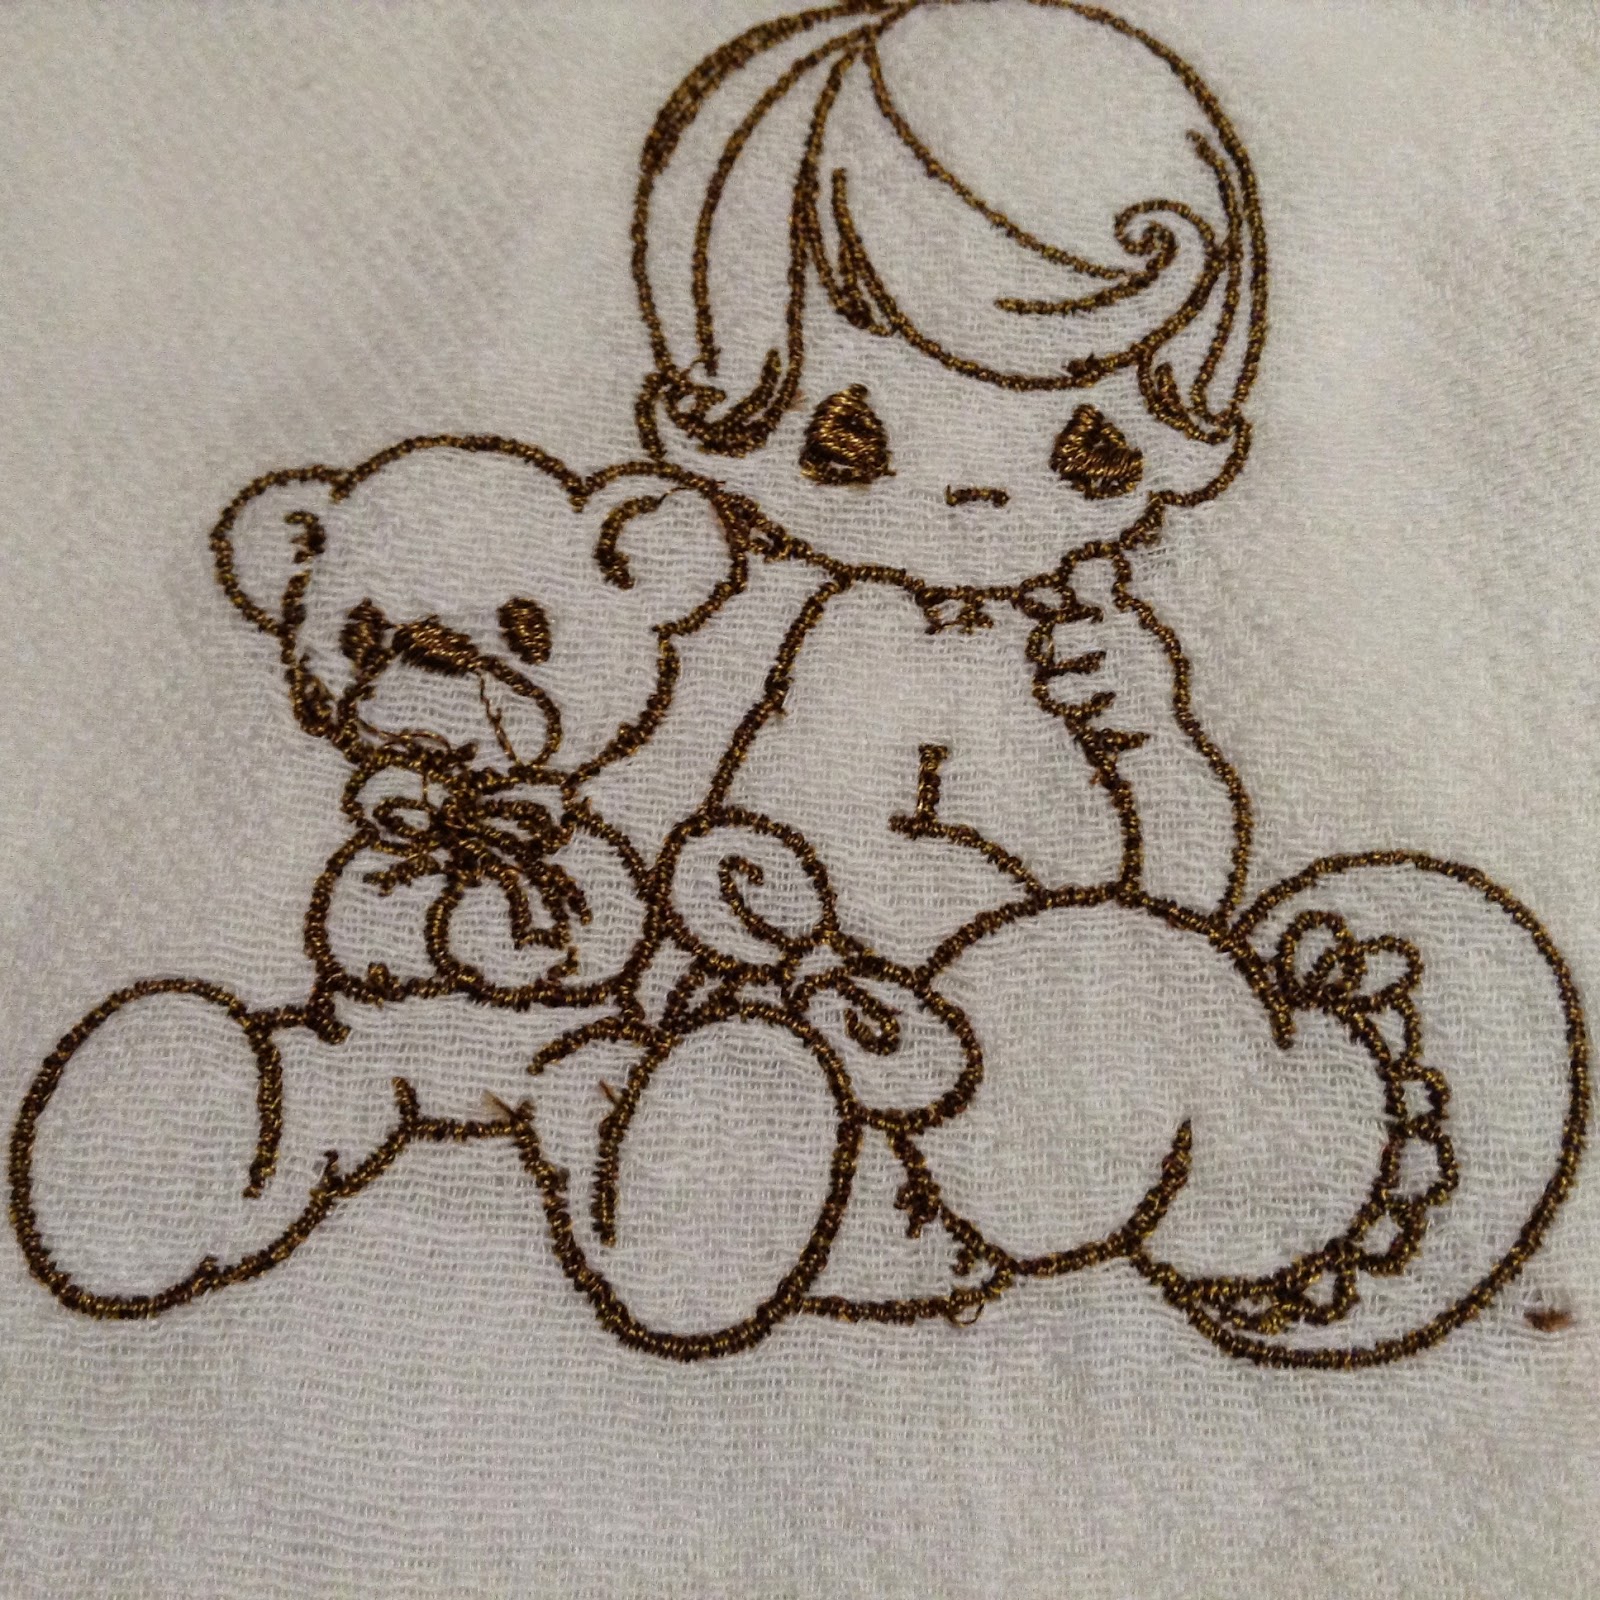
I played with my Janome Digitizer MB (found here) and created these three Precious Moments design.

The clip art was from a Google search for free baby coloring pages.  These were perfect!
I had to tweak the pictures a bit on my Photo Impact program (found here) in order to even out the colors before digitizing.


 I used a variegated thread on each one.  The brown is a brown 'tweed' and has white in it.  The blue tweed on the bottom is the same way.  The baby variegated turned out to be my favorite.  They are all Robison-Anton Threads (tweeds here) (4CC Rainbow found here).

I think it's time to buy a pack of these flat-fold diapers to embroider on and have baby gifts ready on hand!


Sunday, December 2, 2012

GRANDMOTHER'S SEWING ROOM: Advent Calendar

I wanted to make something special for Nathan his 2nd year away from home at Christmas.  I decided to make an advent calendar.  I found the embroidery designs on DesignBySick site, and thought it would be fun to have Nathan get a tiny gift daily till Christmas.
 These are some of the individual designs.  There are 24 different ones.  I sewed onto felt, then made a felt background to sew the pockets on.  I made tabs with large buttons at the top and had a dowel rod for it to hang on. The dowel rod, however, did not get mailed as it was a bit too long.
It was fun filling up the pockets. I 
wish I could have put a different gift card into each pocket, but that would have been too costly for me.  I did, however, get one from McDonalds, one from Taco Bell, and one for Red Robin and put in 3 of the pockets.  If I had remembered before mailing, I would have ordered a couple from Restaurant.com.  There are usually some pretty good deals on there. Some of the things I included in the pockets are:
  • Gift cards
  • sticky notes
  • packs of gum
  • tic tacks
  • tiny plush animal
  • breath mint strips
  • chocolate coins
  • tiny bottle (I thought he could save sand from 'The Sound' in it as a keep sake.
  • Yoo Hoo drink mix (could have been any of the 'straws' that you mix in water)
  • little hand sanitizer
Anyway, now (if he brings it home! lol) he will have a keepsake that he might fill up for someone next year, or we might fill up and send to his brother who will be away on a mission.  I hope it is something he can keep and use with his own family someday.

Friday, April 29, 2011

GRANDMOTHER'S SEWING ROOM: Baby Quilt from a panel


 I made this quilt for a friend's baby. I started with a panel, added a blue border, then pieced a brown and tan border.


This is a close up of the middle of the panel. Usually baby panels are bright and colorful. These soft, muted tones are just so sweet!


This is what I put on the back.  The jelly fish don't quite go with the theme of the toys in the swing, but the colors were muted, too and I thought they went well together. I used this with a darker piece to make the final border on the front.  And aren't those jelly fish with the eyes just cute as can be??

Monday, April 25, 2011

GRANDMOTHER'S SEWING ROOM: Quilt for Japan

 Here is the quilt I sent for the survivors of the Japanese tsunami.
They quilts went to quilters newsletter first. That gal is collecting them to ship to the editor of a quilting magazine in Japan.
 Don't know if you can tell much, but I embroidered (by machine of course) geisha girls on the dark pink blocks.
Here is another one. I had 9 or 10 different ones.

Wednesday, March 2, 2011

GRANDMOTHER'S SEWING ROOM: Nauvoo Temple packet

I hope you can see the details in this. I have made my own pattern of the Nauvoo Temple to use on my embroidery machine and am making a Temple packet for Nathan.  The material is actually very white -- the picture shows too gray, but I guess that helps you see the details.  I think my next one will be the Dallas Temple, where Mark and I were sealed.

Friday, February 4, 2011

GRANDMOTHER'S SEWING ROOM: fringed embroidery


 I found a wonderful new (at least new to me) machine embroidery technique here.
Of course I had to try it out on burp rags! I have several more of those I can decorate yet!

This picture is taken before I pulled the fringes out. The flower on the right is made with wide satin stitches. The one on the left has had the bobbin threads cut out. The remaining threads were pulled out to make the 'fringe.'


And here is a close up of one of the flowers. You need to be careful when clipping the bobbin thread: if you accidentally clip the top thread, it will pull out and leave a bare spot (you can tell at the top where some of the petals are missing).  I thought this was a fun and pretty flower to make.

Thursday, February 3, 2011

GRANDMOTHER'S SEWING ROOM: Nutcracker Pillows


 Every year I get my brother and his wife nutcrackers for Christmas.. I started out doing that because I LOVE nutcrackers and didn't have room to collect for myself, so I collect vicariously by giving to him.  After a while it just became the thing I do.. I did tell him if he didn't like the nutcrackers or got tired of them that I'd take them back!

ANYWAY, I found the most wonderful nutcracker patterns here.  I made pillows this past Christmas -- but still nutcrackers!

I had an awful time with the ruffles, so mom had to help me out with that. Before I do this again, I am buying a ruffling foot for my sewing machine! I am actually looking forward to getting this fun gadget!!

I LOVE how these turned out. It is not just 'red work' embroidery, but is actual line art.. I love the crisp, clear details in these. I took a close up so you could see them both.  I will definitely make more things from this set.

Saturday, January 29, 2011

GRANDMOTHER'S SEWING ROOM: Child's Apron

This is my great nephew, Keith.  His mom is a chef, so I thought he needed an apron for when he helped her out in the kitchen.  I sewed strips of western themed material then cut into strips and resewed to make the squares.. For the top I have a double layer of strips. I was cutting it close to the mailing time for Christmas, so I opted to serge the sides rather than put binding. I guess it could have been hemmed, too.  For the strap around the top, I folded a strip of material in half long way, sewed it, then turned right side out.  I put button holes in the apron bib, the put the neck strap through this and tied knots.  Quick and CUTE!! Especially once donned by this sweetie!!

Tuesday, January 25, 2011

GRANDMOTHER'S SEWING ROOM: Easter Basket

I wanted to make something special for my granddaughter's first Easter. I found this cute applique bunny basket from Designs by Sick.  I chose an off white with gold sparkles to do my designs on.             First, put tear away stabilizer in your hoop. Then lay the fabric on top of the hoop.  Do NOT put IN hoop as the sides will be cut away. I put in the 3d color called for to save extra thread changing. The first two colors are to set the fabric on the stabilizer and these stitches will be covered by the final satin stitch


 Sew the first 'design'. Then remove the hoop from the machine.  Cut as close as possible to the thread to remove the excess. I have found that my curved scissors that I use for cutting the thread works wonderfully for removing the excess fabric.
 Once the fabric is cut away, put the hoop back on the machine and sew the 2nd color, which is another set to hold down the original shape. Again, this will be covered by the final satin stitch, so I just used the 3d color, which is the first color of the design.
Go ahead and start the design. Do ALL but the last two colors.
 Remove the hoop from the machine and turn upside down.  Place the inside basket fabric on the back of the hoop. Make sure you have a large enough piece of fabric to cover the outline.
I used scraps of water soluble stabilizer (wss) to hold the fabric in place.  I just wet my fingers and put a drop of water on the scrap piece of wss and put on the corners of the fabric.  I smoothed the fabric in place. When it was time to cut away the excess fabric, this peeled off easily, like 2 sided tape or the gum on some labels.
 Someone suggested that I use Scotch tape to hold the fabric in place. This was a bit easier, but I think the wss held better. The wss I use is thick like paper, not the thin cellophane type. And if you get it too wet, it is a little more difficult to get off. I just barely dampen it enough to make it stick.
You can also use a spray adhesive, but I didn't want that sticky stuff on my hoop.  My aunt uses it and has no problem. I guess use what works best for you.


Before putting the hoop back on the machine, you need to fill the bobbin with the same color that you are doing the final satin stitch in.  Then sew the next design (an outline stitch).  Remove the hoop from the machine and cut around the fabric as close to the stitching as possible.  Place back in the hoop and sew the final satin stitch.  There is no need to change color: the design has to show a change of color in order for the machine to stop and allow you to remove the hoop.  The last two stitch colors can both be your final satin stitch color.


 When you take from the hoop, you can rip the pieces from the excess stabilizer. You may need to trim it, or if it doesn't tear easily you will need to trim it.  Fray Check is great to use on the edges if you accidentally snip too close.  Just put drops of this on the edge. To be totally safe, run this around each edge whether you think you've snipped too close or not. It is a nice precaution.


There are six different bunny designs to sew. Follow the same procedure for all of them.  When you sew the bottom piece, keep your satin stitch color in the bobbin as well as on top of the machine. Sew the first 'color' to hold down the top piece of fabric. Cut it, put the bottom on and sew it down. Remove from the hoop and cut the extra away. Then return to the hoop to sew the final satin stitches.
On your regular sewing machine, using the same thread in the bobbin and on top, and using a zig-zag stitch, attach the sides across the bottom.  If you notice, I turned my bottom piece upside down because I decided that I did not want the white fabric on the bottom of the basket. I just thought the purple (darker) would be better there. 


 Once all the side pieces are on, zig-zag the size pieces together.  They do a have a little curve to them. Here I am starting at the top of the basket and sewing down. I then reverse and sew back up.

 I know this is not a great picture, but wanted you to see the 'bowl' curved up as I was sewing. I had to lean up and peek over the basket sides to see what I was doing on the later sides.


 Here I put the bowl to the back and tried sewing from the bottom of the basket up to the top.  It was a little easier to see this way, but I still preferred sewing from the top down to the bottom.


Here are some of the bunny details. I have shown the bottom and think it looks fine with the dark on the bottom. If I make another one, I will do both sides of the bottom piece with the inside basket fabric.


The pattern called for all silver gray rabbits. I used a beige on one rabbit, off white on a couple, the silver gray on a couple and one rabbit is pink. I changed many of the colors to pinks and purples for the baby.
 There is a handle pattern, but sadly it doesn't fit in my machine.  I therefore took long scraps of each of the top and bottom fabrics and one of the stabilizer.  I laid them out on the cutting board and cut all the same size. I started out at about 2x11, but decided that 2 inches was too thick for a baby's little hand. I cut them down to and inch and a quarter (1 1/4 inch).
 Putting just the white fabric and the stabilizer together, I embroidered Kay's name on the middle of the basket handle. I then put the back fabric on and did a satin stitch down both long sides of the handle.
 Holding the handle in place,I did a tight zig-zag stitch over the satin stitches to hold the handle in place.
The handle could have been a bit longer, but this will do.
 On the inside of the handle, I trimmed the corners close to the zig-zag stitches.

 And HERE is the completed basket!!


Tuesday, January 18, 2011

GRANDMOTHER'S SEWING ROOM: Pillowcases

 I absolutely love making these pillowcases!  The top is all done with one seam, then I just serge the sides..
These were Christmas gifts this year..
wish I'd remembered to take a picture of the ones I sent to my sister.. I will have to have her send me a picture to post here..


 I don't know if you can tell, but the pillowcases on the left are chickens and the trim is corn material!! I thought those turned out really cute!!
And these are the dogs pillowcases again. I made these to match the quilt I made for Geary & Vernetta.  The striped fabric I used for the body of the pillowcases is soooo soft!!  I used that fabric on the back of the dog quilt.
Take a peek here to see why I made them a dog quilt!!

Next time I make pillowcases, I will take enough pictures to do a 'how-to' post on my blog.. these are soo easy and fun to make!

Here's a link to my guide to making pillow cases.