Fall

Showing posts with label Granny's Kitchen. Show all posts

Friday, January 18, 2013

GRANNY'S KITCHEN: Potato Cakes

This recipe is called Mrs. Ireland Potato Cakes. I received it from a Marlene on one of my Yahoo groups.


Start with 1 1/2 cups mashed left over mashed potatoes.  I used a a couple tablespoons more because I was using up an extra pint from the Colonials that we had.

 The next step is to add a cup of rolled oats and a teaspoon of salt.  Also add softened butter. Use 2T to 1/4 cup depending on how thin your potatoes are.
I used only 2T in my batch.


Mix into a dough then pat out onto a floured surface.  Then using a biscuit cutter, cut out into patties.  As you can see, I use a regular sized canning lid for my biscuit cutter!  This works perfectly!


Fry in additional butter.


Turn over and continue frying until golden brown.
Serve warm.


Sunday, December 2, 2012

GRANNY'S KITCHEN: Jerkey

 Deer season is our favorite time of year because of the wonderful jerky that we make.  There is nothing better than the sweet aroma of jerky curing floating through the house on a cool fall day.  Mouths water in anticipation, and parents scramble to find new hiding places for the fresh snacks so that they last more than a couple days!
 Some people use a dry rub jerky seasoning.  I prefer soaking my meat in a marinade before jerking it. My mixture consists approximately the following ingredients:
1 1/2 cups worcestershire sauce
1 1/2 cups soy sauce
2 tsp or so liquid smoke
2 tablespoons brown sugar
1 tsp garlic powder
1 tsp black pepper

I lay my pieces out in the Tupperware Season-Server container. I have THREE of these and use them all! Of course I've had mine for 20+  years, but I see that they still have them.  Well worth the investment!!  The meat needs to soak overnight.  When my dehydrator is full, some of the meat stays soaking in the fridge for a couple days.  I then spread the meat out on my dehydrator trays. I have the Ronco 7 tray food dehydrator and sometimes I borrow my mother's dehydrator so that I can make my jerky in 1/2 the time.  Yes, I make that much! If my mom did not own a dehydrator that I could borrow, I would definitely invest in a 2nd one for myself.
Once the meat is spread out on the trays, I sprinkle different seasons on the jerky pieces before drying.  This varies depending on what I have on hand, but includes the following:
  • My homemade cajun seasoning 
  • Tony's
  • white pepper
  • lemon pepper
  • black pepper
  • taco seasoning
  •  Chili seasoning
  • BBQ seasoning
  • McMormick's steak rub
  • Italian seasoning
  • store bought cajun seasoning
  • french fry seasing
 As you can see, I use whatever I have on hand and whatever strikes my fancy.  I like them all!  My family's favorites are the taco flavored, lemon pepper, Italian (they call it the jerky with the 'grass' on it) seasoning, and cajun flavored.

This year I have started putting each of the trays in little jars. I liked mixing the flavors up, but my daughter wanted to keep the flavors separate.  Another reason why I put in jars is because last year, my kids left the jerky container in reach of the dogs; dogs can open Tupperware!! Who Knew??? 
So.. individual jars it is!! Plus, it makes it easier to hide the small jars: we just put a few of them up for later.

I have tried different jerky recipes over the years, but this is my tried and true favorite.

Monday, April 16, 2012

GRANNY'S KITCHEN: Easy Quiche

I love easy dinners!  And when given free fresh eggs at church today, I decided I wanted to make something with eggs.  I wasn't in the mood for a scrambled egg sandwich, so I decided to make a quiche.
After doing a quick we search, I found a recipe here.

Preheat oven to 400.  Spray a pie pan with oil.
Then I layered in a drained can of mushrooms and diced 1/2 onion. I topped that with a generous cup of shredded Monterry Jack cheese.

In a separate bowl, I whipped up 4 of the eggs, a cup of Bisquick, 2 cups milk, and some salt and pepper.  This I poured on top of the goodies in my pie plate and popped in the oven for 38 minutes.

YUMMY!! 

You can layer anything you want under the cheese.  Maybe next time I'll do a spinach and mushroom quiche!  Looking forward to trying this with different goodies mixed in.

Thursday, April 12, 2012

GRANNY'S KITCHEN: small Angel Food Cake


After making my Tiramisu (found here), I had 6 egg whites that needed to be used.  I didn't want to make meringue, but didn't want the egg whites to go to waste.  I searched the web and found Cookie Baker Lynn's blog (found here) which had a 6 egg solution: a small angel food cake!


6 egg whites
1/2 tsp cream of tartar
1/8 tsp salt
6 Tbsp sugar
1/2 cup minus 2 T flour
1/2 tsp vanilla extract
1/8 tsp almond extract
1/2 cup flaked coconut

Beat the eggs with the cream of tartar and salt.  Add the sugar a tablespoon at a time. Beat until shiny and stiff.  Pour into an 8" square pan.  I did not grease the pan, but will try greasing it next time.
I had some leftover coconut from my Easter Basket Cookies (found here).  That's why the green.. It made it festive!  If I had planned this out, I could have gotten creative with chocolate bunnies and jelly beans for decoration.  Next time!
This is also pretty with just white coconut as you can see from Cookie Baker Lynn's Blog post..
And this is much easier than the Angel Food cakes I remember my mother making!

Monday, March 5, 2012

GRANNY'S KITCHEN: Football Strawberries


It's me, late as ever with my posts!  But when looking at my camera today, I found the pictures I had taken on Super Bowl Sunday.

Wanting a fun, EASY, (and healthy! lol) snack, I just browsed the internet.  I saw several sites with football strawberries on them, and decided that was exactly what I wanted.  (I did make other snacks, too: hot wings, chips and dip, etc..)  But this was the fun SuperBowl snack that I made!

I only bought 3 things for this:
  1. Fresh Strawberries
  2. Chocolate Dip
  3. Instant Icing
Following the directions on the container of Candy Dips, I melted the chocolate discs in the microwave.  Then I carefully dipped my strawberries in that and put on parchment paper to harden.

I popped open the instant frosting, put on the writing tip and added white lines.


Yes, I know these could have been neater.  BUT, I made them right before the big game.  Next time, I'll do the night before and keep in the fridge!

Also, the lines would have been neater if I had used my own frosting (or canned frosting) with my own tips.  I have a smaller writing tip that would have been perfect.

I just say, these balls made it to the Super Bowl, so they've been through a LOT of practice and games!
hehe

And, of course, they were ALL eaten! 

Monday, January 9, 2012

GRANNY'S KITCHEN: Food Storage Shelves

I have always wanted those wonderful food storage shelves that rotate the food storage, but didn't think I had anywhere to put one -- I have no basement and my little pantry is not where you could get behind the shelves to load from the back.  I finally had an epiphany and decided I could put them in my kitchen at the snack bar (where I have access to both sides of the cupboard!).
First, Mark (my dear, sweet hubby) put wood strips on shelves to keep the rows of cans separated.  Then he drilled extra holes in the sides of the cupboard.  There were already holes for the adjustable shelves, but it gave the shelves too much of a slant (by putting the back of the shelf one peg higher than the front).. so he added holes in between so it would not be such a rise -- I think maybe an inch and a half taller in the back.
He also put a strip of the wood across the front to hold the cans in place.
This is the picture of the bottom shelf from the back side.  This side is under the snack bar and was a cupboard that I didn't use much. I kept large pots in there as it is not easily accessible.  I'm not sure where I'll put my large pots now!! BUT, I love my shelf!
Here is the completed side (from the front).  We're going to leave it open, but when I get new cabinets one of these days, I will have the doors on them.  Mark likes the way it looks like this! And, I have to admit, I like it, too.

This opening is larger than the back where the door was. This cupboard was originally a corner piece and another cabinet came across from here, so there was just a piece of paneling covering the hole. We took that out to make this opening. The back still has the cabinet door on it that I open up to fill.
This particular cupboard ended up holding exactly 16 flats of veggies (if I use all the same size -- less because as you can see, I have some larger cans in there. Each shelf holds 8 of 4 different cans.  With my 6 shelves, I have space for 24 different canned goods. I can tell I am definitely going to need more of these, as I have some product that didn't fit!  PLUS, I've not included ANY soups at all!  I need one just for soups and the smaller (mushroom, tomato paste, etc.) cans.
The spacing was perfect to hold 2 of the canned chicken (or tuna) cans, so there is room for 16 on my shelf.  The space seems wasted when I put mushrooms and other small cans on the shelf because of the dividers.  Our next shelf needs to have specific dividers for these cans or possible adjustable dividers -- we are thinking of how to do that. 

Now, to vacuum up the sawdust mess and plan for my next storage shelf!

Wednesday, January 4, 2012

GRANNY'S KITCHEN: Organized Spices

Woo Hoo!  My spices are finally organized!!  I first read about this last February HERE at the Prepared LDS Family Blog.  I had forgotten about it until I found it again and posted (again) on what a great idea it was!

Hubby was home today, so I talked him into making the stair steps.  My shelf has 4 tiers made from a 2 x 12. The bottom and top shelves are 2 x 9  and 2 1/4 (from one piece of 2 x 12) . The middle two shelves are 6 3/4  and  4 1/2  cut from another piece of the 2 x 12.  I think it turned out GREAT!

Friday, July 29, 2011

GRANNY'S KITCHEN: Home Canned Tomatoes

First of all, I want you to notice my new canning pot!  I was at a kitchen outlet store in Branson, and bought this 30qt Hamilton Beach stainless steel pot.  It holds 11 quart jars!!  I only have ten here, because that's all the tomatoes I had. How wonderful to get my ten jars done at once instead of in two batches!!  I used to have 2 old porcelain water bath canners, but I wore both of them out -- they sprung leaks in them.
Anyway, this should last quite a while!  It is nice and thick.  For the inside, I put one of my cookie cooling racks. It works fine, although now I will have to buy a new one for my cookies!  I always pour a bit of vinegar in my canner so that the lime doesn't build up on my jars (we have very hard water here, and if you don't do that, the jars come out WHITE because of the lime -- whoever said it takes millions of years for those limestone formations to form in caves has never been to Missouri!!). Anyway, the vinegar was hard on my cooling rack, and rusted it out.  Wonder if I could find some stainless cooling racks??

One gal at the shop where I bought my new pot said that she just puts a towel in the bottom of the pan! I may have to try this. It is just boiling the towel, which won't hurt a thing. And the towel will keep the jars off the bottom of the pan. I should have done that rather than ruin my cooling rack!

Also notice that I DID can on my electric glass stove. It did work. It just seems to take a while to get the water boiling. I know they say not to use pots that much bigger than the burner, but what's a gal supposed to do when there's tomatoes to be put up??!!

I was short on time, so I did not cook my tomatoes down like I normally do.  I blanched them in order to slip the skins off, then put them in my electric dutch oven to heat up.  I washed up my jars and filled them with the hot tomatoes and added 1/2 tsp canning salt to each quart jar. I then put in my new canner and boiled for 35 minutes.  That's all there was to canning tomatoes.  They are prettier if you cook them down first. If I have enough tomatoes to do another batch, I'll make a post on that method.

Wednesday, July 6, 2011

GRANNY'S KITCHEN: Strawberry Jam


I tell you, it is amazing that strawberries are so affordable when everything else is almost not!
Aldi's has been fluctuating between .89 - .99 /box (quart) of strawberries, depending on the week.

I bought a flat and made jam. YUMMY.  It is almost gone already.. but I have another flat of berries waiting for me to put up into more jam.


The recipe I used is simple:
1. Mash strawberries with a 'tater smasher' until you have 5 cups mashed berries.
2. Put in cooking pot and add a box of pectin.
3. Bring to a boil.
4. Let it boil steadily for a minute then pour in 7 cups sugar.
5. Bring back to a boil and skim the foam off the top. (I put this in a bowl for those who want to sample it).
6. Jar it up and process for 5 minutes in Boiling Water Bath.

I have no idea when or why I started doing this, as I used to never BWB my jellies (or pickles for that matter).  But I did sterilize my jars by boiling them before using them for canning. Now I just make sure they are clean by rinsing in hot water (cold jars break if you pour hot jelly into them), then put my hot lids on and drop in the boiling water bath.  I figure it doesn't matter if I boil my jars before or after I put the jam in them -- and it doesn't seem to hurt the quality of the jam by putting in the BWB.  *A bonus is that it is a bit easier on the fingers to fill a jar that has just been rinsed off rather than get the jar out of the boiling water to use.

Friday, June 17, 2011

GRANNY'S KITCHEN: Easy Manicotti for a Crowd


 I Decided to make manicotti for the missionaries today for dinner. (and I hope that someone it taking the time to make a nice dinner for my missionary son in Washington, too!).

I  bought 3 boxes of manicotti shells (which have 14 pasta shells each in them).  The first box I cooked all at once. I decided it was better to cook 1/2 a box at a time. Then I just picked up from the boiling water, drained a few seconds and put on a tray with waxed paper.

For the filling, I mixed 2 boxes of ricotta cheese, and 1 box of cottage cheese, 3/4 cup Parmesan cheese, and 6 cups of a colby blend shredded cheese. I added 3/4 tsp pepper and just shook in some Italian seasoning (I would think 2 or 3 teaspoons). I mixed it all together then divided it into 6 parts (one part for each 1/2 box of manicotti shells.

I had found this big spritzer cookie maker at a garage sale and bought it since my kids are fans of the spritzer cookies (found HERE on my blog). It has a larger capacity and has a tube ending that was perfect.  Using a pastry bag and large tip would also have worked, but I wanted to try my 'new' sprtiz maker.  By dividing the filling per row, it made it easier to judge how much filling to put in each shell.

Once the shells were filled, I poured some bottled sauce (just use your favorite sauce here: I like a thick and chunky spaghetti sauce, it could be homemade, but I like bottled for easier assembly).  The box stated that you could also NOT cook the noodles, but I didn't want to experiment on the missionaries and possibly end up with crunchy pasta!  Let me know if you've ever made this without pre-cooking the pasta.

After placing all the noodles in a Pan (one box per baking pan), cover with foil and bake at 350* for 40 minutes. Take the foil off and sprinkle on a handfull of mozzarella cheese and put back in the over for another 15 minutes without the foil.

Here is one of my finished pans. I cooked up 2 of the pans, and put the 3d pan in the freezer for another day.

I served with easy garlic bread (on my blog HERE) and a leaf salad for a couple easy sides.  For dessert, we had root beer floats (another easy thing to serve).

Wednesday, June 8, 2011

GRANNY'S KITCHEN: Chocolate Heart Pizza

I made another missionary pizza for my guy. This one is more like a peanut cluster candy rather than a rice krispy treat (cookie)..
This one is more of a candy than a cookie.  The recipe came from the "Taste of Home 2010 Quick Cooking Annual Recipes" book that my mother gave Natalie for her birthday.
Take: 1 1/2 cups milk chocolate chips and 1 cup butterscotch chips and melt in the microwave (3 minutes on medium or 50% power).  The chips still look like chips, but are shiny when they are ready. Stir until smooth and mix in 3/4 cup mini marshmallows, 3/4 cup crushed potato chips, and 3/4 cup chopped peanuts.  Pour out onto waxed paper (with an 11 inch heart drawn on it -- you can see part of my line at the lower left of the heart in the photo.  Sprinkle on 2 tablespoons coconut, 1/4 cup milk chocolate m&ms and 7 maraschino cherries (halved) -- I left these off the one I sent to Nathan because I wasn't sure if they'd hold up in the shipping, but had them on the one I sent to the fundraiser dessert auction and the one I made for the family. :)
Then in a small container, melt 2 tablespoons white chips and 1/2 tsp shortening (took about 2 minutes on 50% medium power).. I stirred and drizzled over the top of the 'pizza'.

I bought a plain pizza box from Mudduck's pizza to mail this in. (it was wrapped all in cellophane)..  I sent a pizza cutter with the first one we made, so hopefully he still has that!  Mudducks now has printed boxes rather than the plain. :(  But it will be fine -- I'll just put a label on top of whatever box I get. I'm sure it will mail just fine even printed.

I know this is a duplicate of what I already posted on my blog for him, but thought I'd post it here, too. I need to copy the rice krispy pizza blog post to his blog -- I want to have it all published after his mission for a keep sake, so need to post there, too. :)

Thursday, May 26, 2011

GRANNY'S KITCHEN: Eagle Brand Graham Bars

 I forget who gave this book (published in 1979) to me, either my wonderful mother or my grandmother, but I decided to browse through it the other day and found a simple looking dessert recipe.  I had to remember that this was the time before microwaves, and it was still and easy dessert!


The first thing to do is to take 14 graham crackers (24 halves) and crush in a bowl. Add a small package of chocolate chips (really, it asked for a small pkg rather than so many cups or ounces!) and a can of Eagle Brand Milk (this is the sweetened condensed milk, NOT evaporated milk).  Let it set for half an hour to soak up the sweetened milk.


 After it has set for half an hour, press into a buttered pan.  I forgot to butter this batch, but it came easily enough from the pan.
Bake for 350* for 20 minutes.

This picture doesn't look much different than the 'raw' above, but it is now a 'bar' and can be sliced.

We really did enjoy these!  When sliced, we rolled in powdered sugar. We ate them as we cut and rolled them, so once again there is not a photo of the final product. :)

Mark is now asking for another graham cracker dessert that I make with Kool-aide powder. I will have to make another post for this dessert.  Maybe I'll create a challenge for myself: make several posts on desserts made with graham crackers!

Wednesday, May 25, 2011

GRANNY'S KITCHEN: More Laundry Soap

I was out of laundry soap again, and decided to try a different recipe this time. I made a batch that used my whole Fel's Naptha bar rather than just 1/3 of it. This recipe makes 5 gallons, which you dilute 1:1 with water (fill empty jugs 1/2 full of the soap, then finish filling the jugs with water). Then use 1/4 cup for front loading machine (or 5/8 cup for top loading.)
So, now I the equivalent of 10 gallons of laundry soap made up from things I already had stored. :)

Here's what to do:
Grate a bar of Fels Naptha soap into a large pot about 1/4 full of water (4 cups or so). Then bring to a boil. As it melts add: 1 cup Washing Soda and 1/2 cup Borax. Stir till melted.

I filled my 5 gallon bucket 1/2 full of hot water then stirred in the soap mixture. When it was mixed well, I finished filling the bucket. Then let it set overnight to 'gel'.
Remember you can add scent by putting in a few drops of essential oils (I like Jasmine or Orange) to each jug.  I have rose scent that I use sometimes for my lingerie, but find I don't like that for all my laundry.
When this large batch is gone, I am going to make a batch using my Castille soap.  So far, of the Fels Naptha and the Ivory, I don't have a favorite.

Thursday, April 28, 2011

GRANNY'S KITCHEN: Missionary Pizza (Rice Krispy Pizza)

I was wanting to send Nathan a fun box of something, and read about making a pizza out of rice krispy treats and sending in a pizza box.

I dug out Mark's favorite rice krispy treat recipe and put on my pizza board that was lined with parchment paper. I wet my hands with cold water to keep them from burning and sticking as I pressed and shaped the bottom.  The next layer was about a cup of melted chocolate chips. If you use milk chocolate rather than semi sweet, you will need to add a dab of butter or oil to make it smooth enough to spread.

I then melted some mini marshmallows with some butter and spread on top of the chocolate. This was the cheese part of the pizza.  The 'pepperonis' are fruit roll ups that I cut out with a medicine bottle lid.  I wrapped all this up with cellophane wrap (not with the pizza stone! lol, I had nothing but the parchment paper circle under it, but you might put a piece of cardboard under it if you want) and put in the pizza box.  I love how there is NOTHING written on Muccuck's pizza box, but they have ordered printed boxes. :o( Oh well, maybe I'll get another box or two picked up before they get the printed boxes in. :o)

I picked up a new pizza box and put the cookie pizza inside. Tomorrow, I am heading to the dollar store to find a pizza cutter to put in the box with it, then it will be shipped to Nathan at the MTC.

My husbands favorite rice krispy recipe (chocolate scotcheroos)
~Boil together 1 cup sugar and 1 cup corn syrup, then remove from heat.
~add in 1 cup peanut butter and 6 cups rice krispies.

This is all I usually do, and hubby really loves it.  The recipes goes on to have you melt 6-oz chocolate chips and 6-oz butterscotch chips over hot water (I use the microwave, but you have to think the book is copyrighted in the 70s! lol) and spread over the top. Maybe next time I will spread the butterscotch/chocolate chip mixture on the pizza rather than just chocolate.  It is big enough to share.

Monday, April 25, 2011

GRANNY'S KITCHEN: Easy Garlic Bread

 Needing to make garlic bread and I hate doing that whole mess with the melting of the butter, cooking it with crushed garlic, slicing the bread and pouring it over and into each slice, wrapping into foil, and cooking. Whew, that wears me out just thinking of all the steps!
The way I make my garlic bread is so much easier and more tasty!!
 If you have french bread, slice it in half and lay it open.  I didn't have any, but had some hamburger buns that needed to be used. I opened them up.
If you have soft butter, that is preferable, but spreadable margarine works. I used some that was not made with hydrogenated oils. Whatever you use, spread the butter on the top of the slices.  Sprinkle with garlic powder and pepper.  You can sprinkle some parsley on that: I sprinkled Italian seasoning on mine.  Then top with a hard cheese. I usually use Parmesan, but this time used Romano.I cut each bun in half.  When doing large French bread, I leave whole and break it at the table.
It only takes a minute or two under the broiler until you have the PERFECT cheesy garlic bread!!

Wednesday, March 23, 2011

GRANNY'S KITCHEN: Corned Beef and Cabbage

 Every year for St. Patrick's Day, I make a huge pot of Corned Beef and Cabbage, then can up a pressure load to have for easy meals through out the year.
This year, I worked on St. Patrick's day, so I did this on the day after.  Also, I decided I didn't want to can the meat at night, when I was full of food and tired, SO, I put the briskets in my roasting oven the night before!  Here are the 7 briskets cooked up in the roaster -- it takes about 1 brisket per quart jar. Cover with water to cook.


I pulled out one brisket at a time and laid the fat side down on a plate. Then cubed the meat down to the fat.  Then I used tongs to pick up the meat and put in the hot, clean jars.  The fat, for the most part, stayed on the plate unless I cut too far.


 I put the fat pieces into another bowl to make a yummy snackie for the pups. :o)


Here you can see my canner on the stove. I usually use regular sized lids for corned beef, although last year I filled a couple wide mouth jars with larger pieces of corned beef. That was good, too, but this easier, I think. Fill the jars with meat, then add the cooking water to 1/2 inch from the top.
Look at the cool silicon funnel my mother bought me!  It 'collapses' down flat for easy storage in a drawer.
Put hot lids and rings on the jars, then pressure for an hour and a half.
And here are the completed jars. YUMMY!  I love to open a jar of corned beef and eat it.  It tastes just as good then as it does on St. Patrick's Day!!

After I canned up my 7 briskets for a pressure load, I added a couple briskets, cabbage, potatoes, onions, and carrots to cook the rest of the day for dinner.  My canning was done BEFORE midnight!  I like doing it this way.

Saturday, March 19, 2011

GRANNY'S KITCHEN: Mr. McBride's Soda Bread

I never met Mr. McBride, but he was apparently a well loved, and highly respected educator.  He, I believe, was the principal at Scranton School, in Cleveland, where I worked: he retired before I moved there.  Cleveland has a large Irish population, and this was Mr. McBride's recipe that everyone made every year at St. Patrick's day.  And the recipe came to me, too, so I've added it to my traditional St. Patrick's Day feast.


Start with 2 cups of raisins.  I had both regular raisins and golden raisins, so I started with a cup of each.  I put them in a colander.
Run hot water over the raisins to wash them, then drain them well.  I just left draining in the colander while I mixed up the flour.


 Prepare a skillet by greasing it. I just used a stick of butter to grease my skillet.   Sometimes I cook this in a round cake pan. Sometimes I use my round skillet.  You can also use a 2 quart casserole dish.

Preheat the oven to 375*
 In a bowl, mix together 4 cups flour, 1/4 cup sugar, 1 teaspoon salt, and 1 teaspoon baking powder.
I mix it with a pastry cutter, then blend in 1/4 cup Crisco with the cutter. (I don't use much shortening, so find it easier to keep a few pre-measured Crisco sticks in the fridge -- easy to measure, too-- just cut off 1/4 cup!!)  When the Crisco is blended in, add the raisins.
In a separate bowl, beat an egg then add a teaspoon of baking soda and 1 1/3 cup buttermilk.  (I didn't have buttermilk, so I put about 2 ounces vinegar in the bottom of my measuring cup then added milk up to 1 1/3 cup to make soured milk.

Stir the egg mixture into the flour mixture, then turn out on a floured counter and kneed it just a little bit.  Shape it into a ball, then press it down in the skillet or casserole dish.  Take a sharp knife and cut an X about 1/4 deep across the top of it.  Then dust with flour (I forgot this part, but it still looked good!!).

Bake until brown and baked through, about 55 minutes.  Remove to a cake rack. (especially if you cooked it in a skillet -- I discovered that it keeps cooking in the pan and gets a little done if you forget and leave it in).

Cool before serving.  At dinner, I poured some broth off the corned beef over my chuck of bread (we 'break the bread' rather than cut it) and it was DELICIOUS!!

GRANNY'S KITCHEN: Canning Bacon

 I could not believe my luck when I found bacon on sale at Ramey's. They had a 10# box of bacon on sale for $15! 

Our family LOVES Yoder's Bacon, so I thought I'd give it a try. 
 The Yoder's Bacon comes in a regular sized can and seems to contain the equivalent of 3 # of bacon per little can.  You slide out the parchment paper, unfold it and have about 3 layers of yummy bacon to heat and serve. 

Shooting for that scenario, I laid my bacon out on full sized parchment sheets to fold in half and roll up.  I was thinking large mouth pints (equivalent to Yoder's can), but ended up with large mouth quarts.  Wish I had enough large mouth 1 1/2 pint jars: that would be PERFECT for this project.


 Folded and half and squeezed down into the jar, my parchment paper stuck up a bit, so I just pushed it all down into the jar.

I have no idea how Yoder's gets all that bacon in their cans!!  I was able to get approximately 1# of bacon per quart jar (as opposed to their seemingly 3# per pint jar!! -- I tell you, well worth the price, especially if you love camping!!).

Anyway, this will be so much more worth it because of the great sale price I found!  When this box is complete, I hope they still have some more, so I can do it again!!  This will be soo handy to have camping -- no need to have bacon taking up cooler space! Maybe I'll take my egg powder to make scrambled eggs instead of fresh eggs, too -- save cooler space PLUS, Nicolas only eats scrambled eggs anyway.. maybe he won't notice the difference. LOL


 I decided that I didn't like squishing the parchment paper down into the jars, so for the next jar, I cut the parchment to fit.  The parchment pieces I used were about 6x38.. and that seemed to work just fine!


Rather than folding the bacon, I decided to cut it, too.  Yes, I used scissors!  Worked just fine.


Here are my cuts bacon pieces ready to roll up.  So I just rolled up and put in the jars.  There is space around the bacon in the jars because I couldn't get more in than the size of the lid opening. If I could find more 1 1/2 pints, they are tapered -- the jar is the same size as the wide mouth opening. I'll see what I can come up with.  
 I put a little extra water in the canner because I almost ran dry when I made my liver the other day.  My jars floated -- probably because of all the air space.  If I didn't let my weight on the canner giggle so much, I wouldn't lose as much water.  I do NOT recommend having floating jars -- it could cause them to break.

Cook at 10# pressure for 90 minutes.
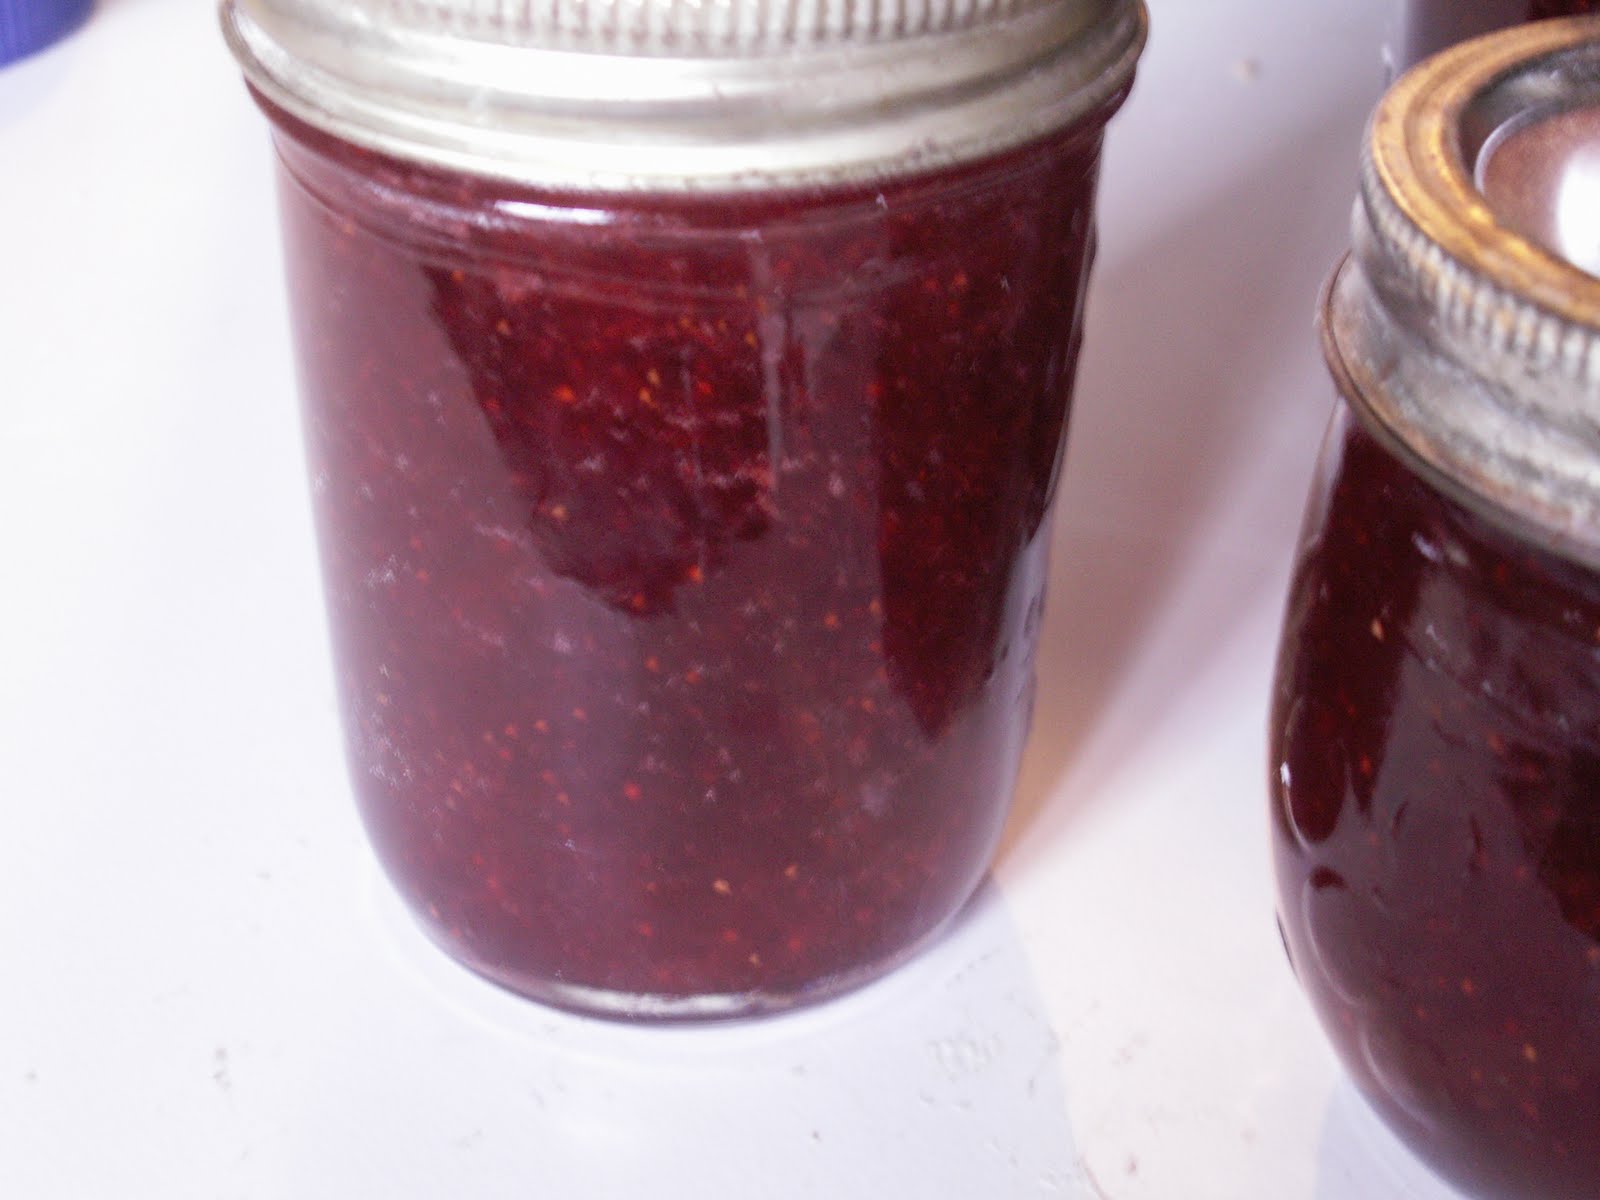
 Here are the jars fresh from the canner.  Luckily, I had no broken jars.  They have all sealed and look wonderful!  There is a layer of fat which congeals when cooled.  There is also some 'bacon broth' under the layer of fat, which I think will make a yummy breakfast gravy!